

Introduction:
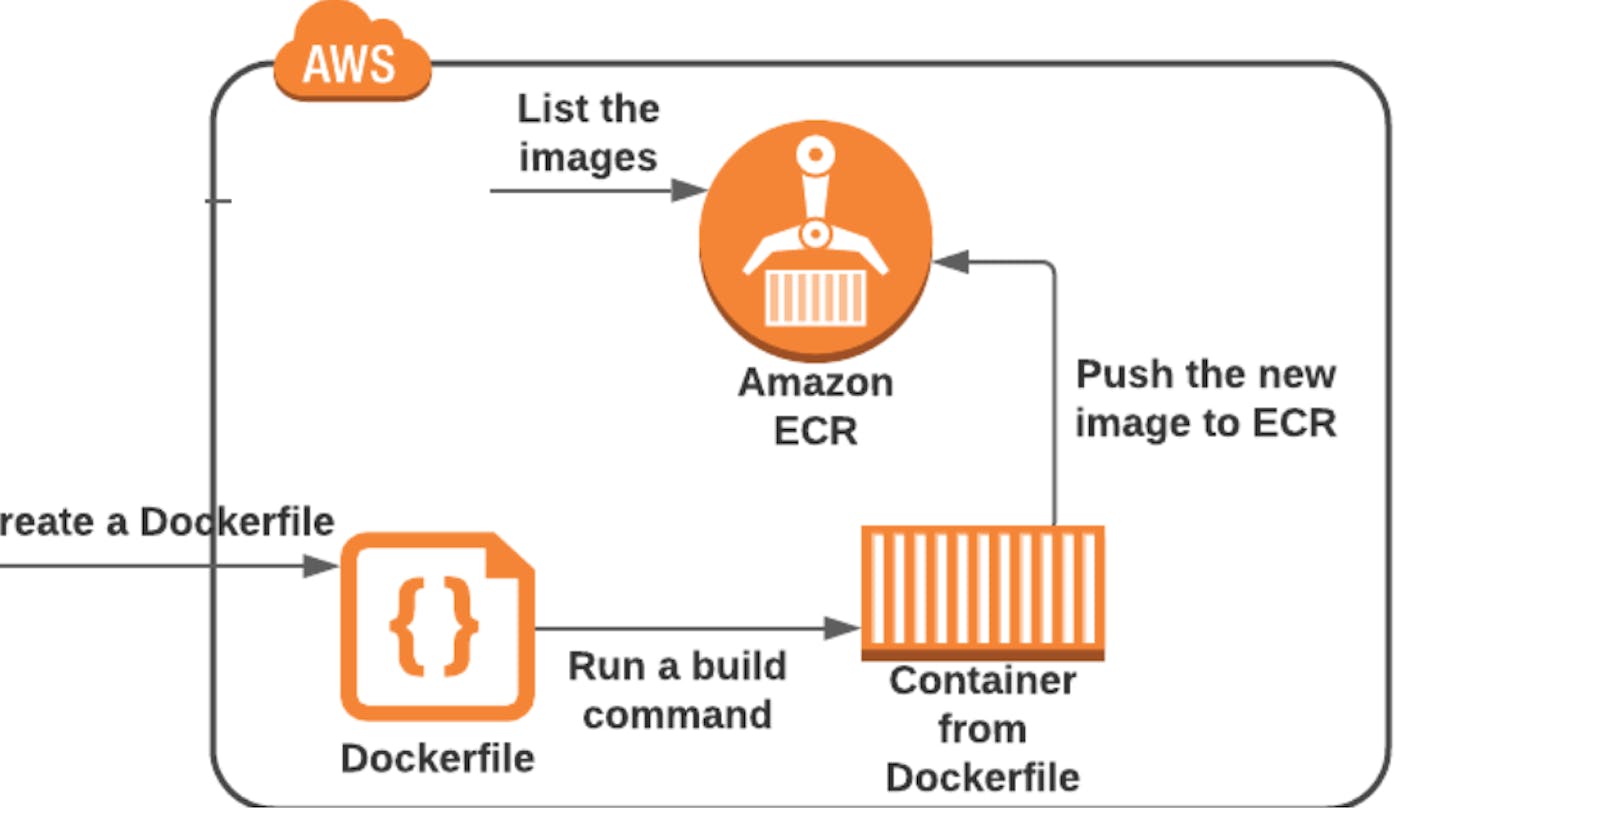
In this Project, I'll share my insights and experiences with building and deploying Docker containers using AWS ECR (Elastic Container Registry). AWS ECR is a fully-managed container registry service that makes it easy to store, manage, and deploy Docker container images.
How to do this project I will explain step by step-:
Step-1
create EC2 Instance (Type T2 Micro) on AWS console

Step-2
Login EC2 instance using ssh

Step-3
Enter below command
$ sudo apt update –y
$ sudo apt install docker.io –y

$ sudo systemctl start docker
$ sudo systemctl enable docker
$ sudo systemctl status docker

install awscli in your machine using below command
$ sudo apt install awscli -y

Step-4
We need to create IAM role in our AWS console go IAM in your AWS console
Click on Create User button

Enter the user name
Check mark on Provide user access to AWS management console
Click on I want to create an IAM user
Enter custom password/Autogenerated password as per your requirement
Remove the checkmark User must create new password
Click on Next

Select the permission Attach policies directly
select the AdministratorAccess
Click on Next

Click on Create User

Successfully created the IAM user

Step-5
Now we are going to create the ECR (Elastic Container Registry)
Click on Get started

Visibility setting select the Private
Enter the repository name
Tag immutability Enable/Disable as per your requirement as I am disabling it.

Enable/Disable Scan on push option as I am enabling it
finally click on Create Repository
ECR successfully created as per below given

Step-6
Open the IAM user created on aws console
Click on Create access key

Select Commad line Interface (CLI)
Checkmark on I understand the above recommendation
Click Next
Type Description Tag value
Click on Create access key

Download .csv file and click on Done

Step-7
Now came to your GitBash terminal, we have already installed docker and awscli as per above steps
We are going configure the aws cli
Enter the command
$ aws configure
Enter the access key & secret key downloaded from .csv file
Region as per your AWS region
Default output format Json

Step-8
Next step is to create the Dockerfile
$ vi Dockerfile
Save the file and exit

Step-9
come to AWS console open the empty ECR registry which we created in above step
Click on view push commands
copy authentication token command and run in our terminal

$ aws ecr get-login-password --region us-east-1 | docker login --username AWS --password-stdin 861342055105.dkr.ecr.us-east-1.amazonaws.com

Step-10
Build Docker image
$ docker build -t ecr-demo-reg .

Once build is successful we are going to create the tag for image
$ docker tag ubuntu:latest 861342055105.dkr.ecr.us-east-1.amazonaws.com/ecr-demo-reg:latest

Push the image to ECR repo which we created

Now we successfully pushed docker image to ECR repo

After completion of this project, you can delete the ECR repository and EC2 instance to save the unwanted billing
Conclusion:-
Successfully completed the hands-on project, we learned the creation of IAM user, ECR repo creation, dockerfile creation and push it to ECR repository.